Funtextic
USER MANUAL
Description
SUGARfx Funtextic is a tool to create 3D text animations quickly and easily in Final Cut Pro X.
You can control where and how the text is moving at any time throughout the length of the animation by simply following its interface and on-screen controls.
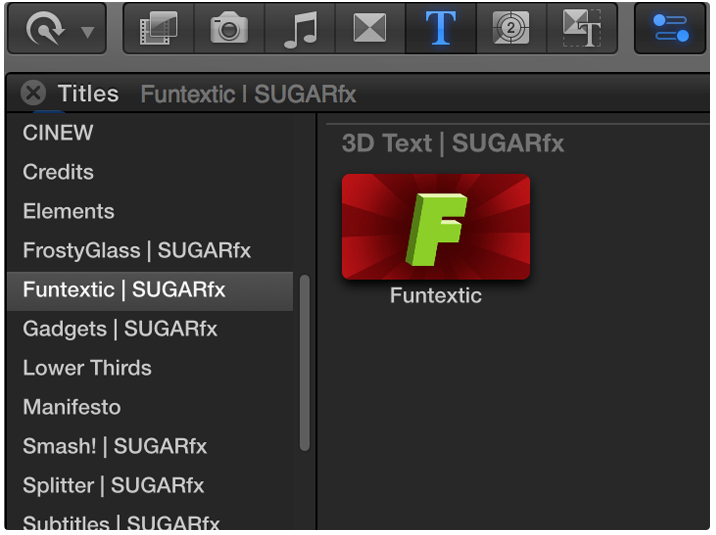
Funtextic can be found in the Titles browser under the Funtextic | SUGARfx category, or in the Themes Browser under the 3D Text category.
Funtextic is a title element that can be placed on top of a section in the timeline, and the video underneath can be treated somehow via this procedure.

Presets
Check this video tutorial about "Using Presets"
The Funtextic templates offer complete control of the animation at any time and with a friendly and intuitive interface providing drop-down menus with pre-established settings.
The Preset drop-down menus are positioned in the lower area of the Viewer window to quickly get your animation going.
You can use the specific presets for the key points of your animation, from the Start to the End, and make any combinations that may include a variety of animated Effects that you can add as you like.

The available Presets and the custom Presets that you create store ONLY the value of the parameters marked with a small dot (•) at the front of its name (i.e: • Horizontal [ X ] )
The OSC+Guides button reveals the Funtextic timeline on top of the screen to help you in the modification process or in the preparation of custom Presets.
3D Environment
Check this video tutorial about "The 3D Environment"
Funtextic is animated inside a 3D environment, so you will be able to see the coordinate lines or axis in 3 different colors. The Red axis is the X coordinate that goes from one side to the other, the Blue axis is the Y coordinate that goes up and down, and the Green axis is the Z coordinate, and this one goes towards the camera and away from the camera.
The green axis usually is displayed as a thick line coming into the camera view depending on the perspective or orientation of the environment at that moment.
When creating the Camera FX presets it is strongly recommended that you enable the viewing of these coordinates, so you will see exactly how the Drifting parameters affect the 3d environment.
On-Screen Timeline
The on-screen Timeline located at top of the viewer window shows 3 disctinct colors:
The Yellow dot corresponds to the Start key point of the animation.
The Red dot at the end corresponds to the End key point of the animation.
And the Blue dots connected by a blue line correspond to the Screen Position.

These key points in the timeline are linked to the parameters of the template which are also color coded.
This means that whenever you need to tweak the Start, Screen Position or End, you need to move the timeline marker to one of these key positions and use the corresponding parameters to adjust the position and orientation of the 3D text.
Check this video tutorial about "The On-Screen Timeline"
Parameters
Check this video tutorial about "The Parameters"
SUGARfx Logo / Help : Get access to this Help document by clicking on the SUGARfx logo.
OSC + Guides : Displays the on-screen timeline and the 3d world axis coordinates.

MAIN SETUP
Camera Lens : This slider provides an easy way to select the lens aperture of the scene. Just like a real life camera lens, a lower value (or wide angle lens) will add distortion to the text elements in the scene when viewed in perspective or from an angle.
CHARACTER ANIMATION
Animate : Select the combination of elements of a Text object that will be mainly affected during the Start and End portions of the animation and depend directly on the Character Blend value to make the animation more or less obvious when staggering.
The elements available for animation are divided in 2 types: the Text Object as a whole, and the Characters as individual characters, or as words, or as lines or all characters at the same time.
NOTE: All built-in Presets and the Presets that you create will be saved using the default Animate combination of Object + Each Character. –When creating your own Presets try out the other combinations to make the preset as versatile as possible, or use abbreviations to indicate the optimal use for your custom preset.
The following combinations provide a wide array of versatility in your animations:
Object + Each Character : Animates the text object as a whole as well as the individual characters. Suggested abbreviation (och)
Object + Each Word : Animates the text object as a whole as well as the the words when multiple words are part of the text. Suggested abbreviation (ow)
Object + Each Line : Animates the text object as a whole as well as the complete line when the text contains multiple lines of text. Suggested abbreviation (oL)
Object + All Together : Animates the text object as a whole as well as all the characters at the same time. Suggested abbreviation (oAll)
Each Character : Animates each text character and ignores the Object position and rotation. Suggested abbreviation (ch)
Each Character (no Spaces) : Animates each text character without the spaces and ignores the Object position and rotation. Suggested abbreviation (ch-)
Each Word : Animates the text character of each word and ignores the Object position and rotation. Suggested abbreviation (w)
Each Line : Animates the text character of each line of text when the text contains multiple lines and ignores the Object position and rotation. Suggested abbreviation (L)
All Together : Animates all the characters at the same time and ignores the Object position and rotation. Suggested abbreviation (All)
Animation : Select the behavior or the style of animation and their combinations for the Start and End. There are 3 animation styles, these are Smooth, Hard and Constant.
The Smooth style makes the text land into the Screen Position and its departure to blend as smoothly as possible with the Start and the End.
The Hard style makes the text land and depart harshly.
The Constant style makes the text land into the Screen Position and its departure without any blending with the Start and the End animation and its speed is a constant value.
Pivot Point : Selects the reference point or "anchor point" when the individual characters are animated.
Fade : Select when a Fade In or Out is needed. The speed and behavior of the Fade depends on the value applied to the Blending Character value of the beginning or end animation.
[ MENU ] : This menu allows you to hide or display the parameters as you need to use them or simply select the Simplified option to display the least number of parameters.
START
ATTENTION : The START Position (color coded in Yellow) corresponds to the Yellow dot location in your on-screen timeline. Move the FCPX timeline marker to match the yellow dot before modifying these parameters, otherwise you won't be able to see the results of your modifications.

• Position : The Horizontal, Vertical and Depth position.
• Object Rotation : Refers to the Rotation of the whole text object and applies only when the Animate parameter of the Main Setup section above indicates that the Object is part of the animation and will be ignored otherwise.
• Character Rotation : Refers to the Rotation of the Text Characters only, and behaves in accordance to the type of character animation selected in the Animate parameter of the Main Setup section above.
OPTIONS
• Scale : Sets the animation percentage for the Scale. A 100 value means the scale will remain at 100% of its original size.
• Tracking : Sets the distance between the characters (known as Tracking) to be animated. A value of 0 keeps the tracking in its original setting, while a positive or negative value will increase or decrease the distance accordingly.
Speed [ Overlap ] : Determines how fast the Start animation completes before landing into the Screen Position. The lower number means it will be as slow as possible therefore overlapping the most and blending with the animation of the Screen Position (blue section shown of the on-screen timeline).
Direction : This parameter dictates the order or direction in which each text element will be animated before the next. (The Character Blend below will dictate how obvious the individual behavior or staggering will be during the animation).
• Character Blend : This parameter determines the range of the text elements following the next element during the animation. A lower value creates a more individualized behavior of each element, and a higher value means that most elements will animate almost at the same time and the staggering effect will be less aparent. (A value of 0 -zero- creates no blend between elements, therefore a sudden pop will be part of the behavior in the animation).

PRESETS : The value of the parameters in this section marked with a dot (•) can be saved using the Start Preset drop-down menu located in the lower area of the Viewer window.
SCREEN POSITION
ATTENTION : The Screen Position (color coded in Blue) corresponds to the Blue location in your on-screen timeline. Move the FCPX timeline marker to be along the area between the blue dots before modifying these parameters, otherwise you won't be able to see the results of your modifications.

Offset : This parameter provides an easy way to synchronize the Start or End positions if the desired animation requires the accurate synchronization throughout. This option becomes important when creating lower third text elements, or animations that need to follow the same offset position as the Screen Position.
• Position : The Horizontal, Vertical and Depth position.
• Orientation : Refers to the direction or orientation of the whole text object while in the Screen Position.

PRESETS : The value of the parameters in this section marked with a dot (•) can be saved using the Screen Pos. Preset drop-down menu located in the lower area of the Viewer window.
END
ATTENTION : The END Position (color coded in Red) corresponds to the Red dot location in your on-screen timeline. Move the FCPX timeline marker to match the red dot before modifying these parameters, otherwise you won't be able to see the results of your modifications.

• Position : The Horizontal, Vertical and Depth position.
• Object Rotation : Refers to the Rotation of the whole text object and applies only when the Animate parameter of the Main Setup section above indicates that the Object is part of the animation and will be ignored otherwise.
• Character Rotation : Refers to the Rotation of the Text Characters only, and behaves in accordance to the type of character animation selected in the Animate parameter of the Main Setup section above.
OPTIONS
• Scale : Sets the animation percentage for the Scale. A 100 value means the scale will remain at 100% of its original size.
• Tracking : Sets the distance between the characters (known as Tracking) to be animated. A value of 0 keeps the tracking in its original setting, while a positive or negative value will increase or decrease the distance accordingly.
Direction : This parameter dictates the order or direction in which each text element will be animated before the next. (The Character Blend below will dictate how obvious the individual behavior or staggering will be during the animation).
• Character Blend : This parameter determines the range of the text elements following the next element during the animation. A lower value creates a more individualized behavior of each element, and a higher value means that most elements will animate almost at the same time and the staggering effect will be less aparent. (A value of 0 -zero- creates no blend between elements, therefore a sudden pop will be part of the behavior in the animation).

PRESETS : The value of the parameters in this section marked with a dot (•) can be saved using the End Preset drop-down menu located in the lower area of the Viewer window.
3D TEXT SETTINGS
A set of parameters to modify the most fundamental options of the 3D Text object, including a Reflection parameter to change the orientation of the reflective environment without digging into the more complex set of parameters in the text editor.
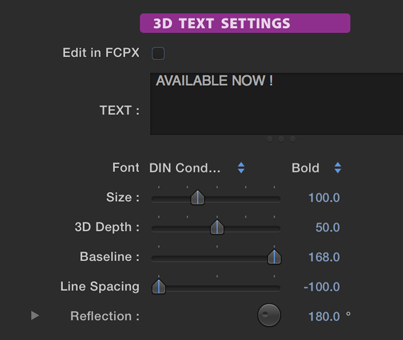
Edit in FCPX : By default the editing of the 3D text appearance is not enabled. This button allows you to use the built-in controls found in Final Cut Pro X to modify and customize the text appearance as much as you like, or use presets to quickly enhance the look with a simple click.
You can either create your own Text Styles or use styles from 3rd party vendors and apply them to your Funtextic animation (Please refer to the FCPX User documentation for more information).

PRESETS : The 3D Text Presets while in the built-in editor in Final Cut Pro X can be used.
FX ( SCREEN POSITION )
This section provides additional parameters to add interesting animation effects to the text elements while they are in the Screen Position or blue are of the on-screen timeline.
As you can see the color of the main label of these parameters is Blue, therefore any modifications done in here will affect the animation of the blue section in the on-screen timeline. You need to move the FCPX timeline marker to match the area along the blue dots before modifying these parameters, otherwise you won't be able to see the results of your modifications.

Scale FX : Button to enable the Scale animation only happening during the blue Screen Position area.
• Scale X, Y or Z : Sets the independent scale of the animation in either axis, X, Y or Z.
ANIMATION EFFECTS
• Vertical Move [ Y ] : Moves the character vertically, or in the Y axis.
• Depth Move [ Z ] : Moves the character back and forth, or in the Z axis.
• Tracking Offset : Adds a separation or tracking effect to the characters.
• Character Blend : Determines the range of how soon the characters follow the next character in the animation. A lower value means lower number of characters or text elements and a higher value means that most will animate almost at the same time.
OPTIONS
Direction : This parameter dictates the order or direction in which each text element will be animated before the next. (The Character Blend in this section will dictate how obvious the individual behavior or staggering will be during the animation).
Speed : Controls the speed of completion of the animation within the Screen Position duration, 0 -zero- being the slowest and 100 the speediest.
Rotation Axis : Optional effect that enables the animation of the characters or text elements in the axis selected.

PRESETS : The value of the parameters in this section marked with a dot (•) can be saved using the FX Preset drop-down menu located in the lower area of the Viewer window.
ADVANCED FX ( Camera )
These parameters refer to the manipulation of the 3D environment and the movement of the Camera in and around the 3D space.

ATTENTION : Use these parameters with caution as the entire 3D environment gets moved and possibly messing up your current animation setup.
It is suggested that you try using these settings with the OSC+Guides enabled before creating any animation. Experiment first to understand how to use these Camera effects to your advantage, or you can also try the CAM Presets available in the menu located in the Viewer window.

• Dolly Move : Adds a Camera move with constant speed in the Z axis to the entire duration of the animation. The positive or negative value will determine if the movement is towards or away from the camera.
• Axis Offset : This parameter provides a global change of the 3d environment without any animation, this is simply an offset.
• Drift Rotation [ X,Y and Z ]: Drift refers to the slow but continuous movement of the camera through the 3d environment. Here you can use any axis or a combination of values to generate such move.
Keep in mind that whenever the 3D environment has been rotated or moved, you will be able to move the text object correctly at the Start, End or Screen Position if you follow the Red, Green and Blue axis lines displayed in the screen as they represent the X, Y and Z axis in the 3D scene.

PRESETS : The value of the parameters in this section marked with a dot (•) can be saved using the Start Preset drop-down menu located in the lower area of the Viewer window.
BACKGROUND BLUR
Funtextic provides an easy way to add a blur effect to your background layer, if needed.

You can select from two different modes. The Blur mode simply adds a blur to the overall image, and the Defocus creates a real camera blur simulation with a bokeh effect.
Technical Support
Our Technical support team is available to answer your questions via e-mail and should respond as soon as possible. (support@sugarfx.tv)
Help
The Help file (or the PDF version of this User Manual) is available when you open the FxFactory application and press on the Help button under the icon of the theme element.
Support
Please visit our web site (http://www.sugarfx.tv) for possible answers to your technical support issues, or visit our YouTube channel at (http://www.youtube.com/sugarfxtv) where you may also find a tutorial that will help you find the answer to your question.
Known Issues
(1) When enabling the Text Editing option in FCPX, you must click away from the Funtextic plugin and then select it again to make the built-in text editor appear in the parameter's Text tab.
(2) Sometimes the selected option in the [MENU] parameter needs to be selected one more time to make the parameters appear or disappear after a few seconds.
(3) When selecting Presets, it may take a couple of seconds to update on the screen, or in some instances you may need to select the same selection again.
(4) When adding Funtextic to the timeline, the labels of the hidden parameters may be visible although the parameters are hidden by default. If this bothers you, select the - Simplify option from the [MENU] drop-down to clear them off.
There are no more issues that we are aware of, at the time of release of this product.
Don't have it yet? - Download and Try.
You can download and install the free trial as part of FxFactory.

|
|
© Copyright 2014 SUGARfx |


Tutorials
![]()
Works In:
 |
Final Cut Pro X |